All business have find themselves in hard time processing the legal documents. HR departments has to manually fill in contracts and other legal documents out from the template. Even the document templates are less flexible to customize and it time consuming to hand handle each documents. Personalizing the templates can be a real pain.
Imagine a document with wide range of placeholders and thousands of data to be processed for the document.
We, Oarkflow, come into the scene with the unmatched solution. On our platform, process all those placeholders on the document template for any number of data.
Let’s start with a scenario
HR department is looking to create contract for 100 consultant and send email to individuals. HR department has personal details of those consultant in csv file.
Let’s separate the operations based on the above requirements.
- Input of CSV file
- Upload of document template and processing placeholders
- Sending Email with contracts attached.
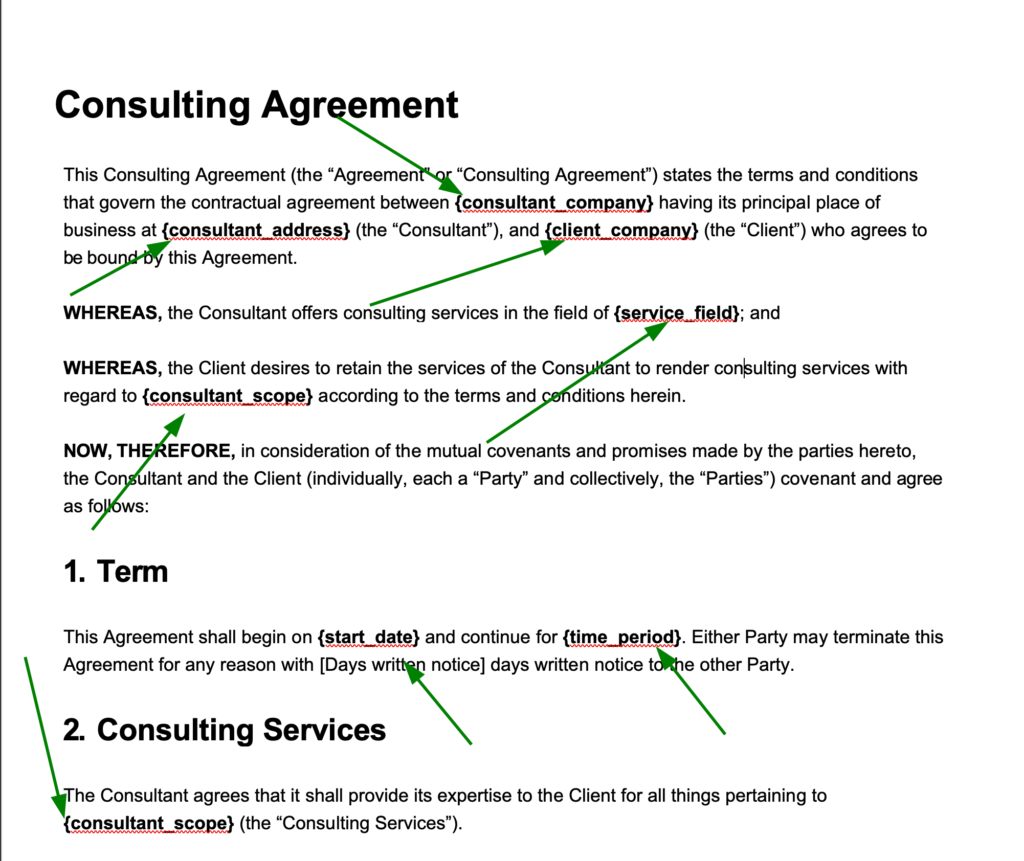
Let’s get started. We need to prepare the document file with placeholders. Placeholders are the key represented by names between { and }. In the images, indicated places are the placeholders
Once the document is ready, we need to make sure we have consultant information in CSV file. File example.
consultant_first_name,consultant_last_name,consultant_street,consultant_city,consultant_state,consultant_postal_code,consultant_country,consultant_rate,consultant_scope,start_date,time_period,service_field
John,Doe,”Fake Street”,”Fake City”,”Fake state”,123456,US,25,”Software Development and maintenance”,2022-01-01,24,”Software Development”
Third step is to Email provider. We can add Email provider using this guide.
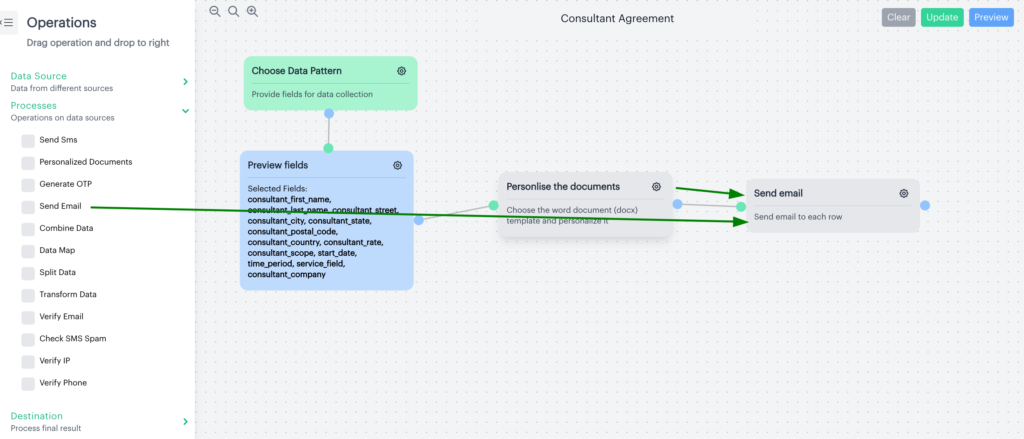
Once we confirm all above mentioned steps are ready, now let’s create flow. For the flow, we need following operations
- Data collection
- Personalized Documents
- Send Email
For Data collection, we need to provide the comma separated field names. In our case, the field names will be consultant_first_name,consultant_last_name,consultant_street,consultant_city,consultant_state, consultant_postal_code,consultant_country,consultant_rate,consultant_scope,start_date, time_period,service_field
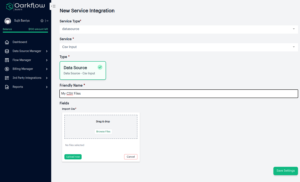
To create a flow, navigate to New Flow under Flow Manager from left menu.

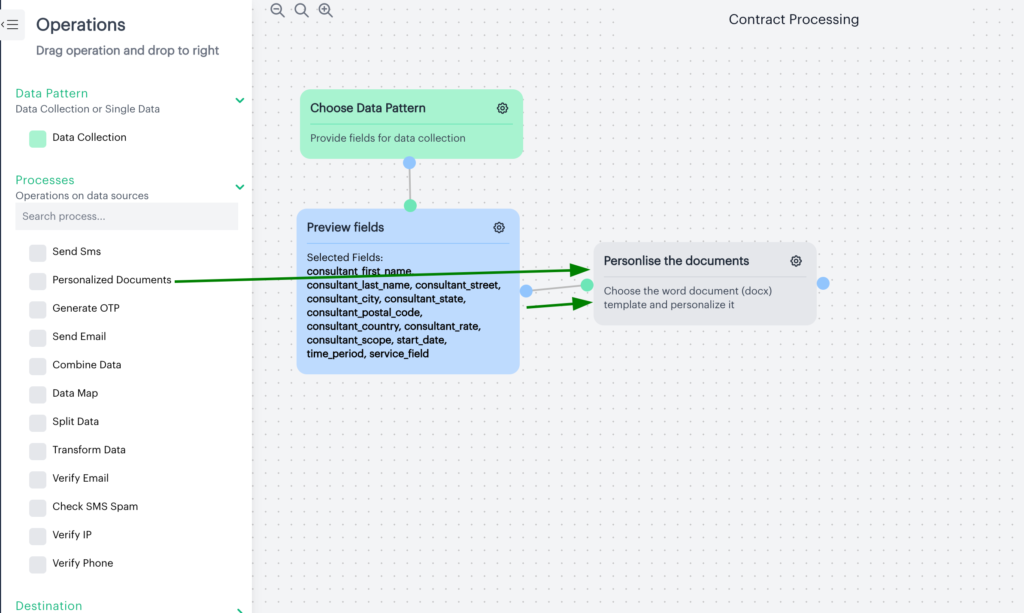
This will bring the page for flow editor. From the Operations menu choose Data Collection and drag it to the right canvas.
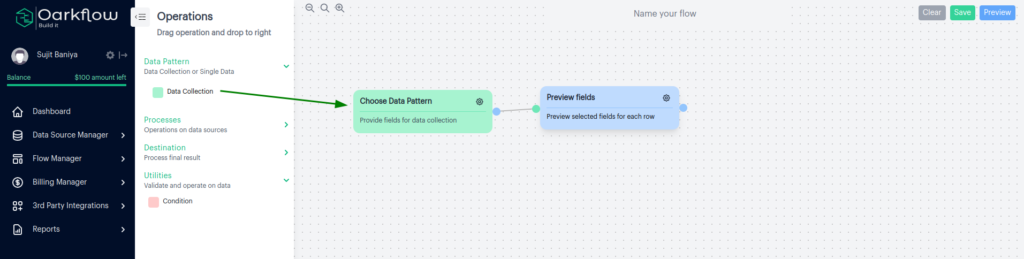
While doing so, on canvas, two nodes are created. Green node denotes the input operation and the field names are required to pass in the input operation. Blue node is to preview and confirm the selected fields. Give the name to the flow on the top middle of canvas. To provide the field names, click on Setting icon of Choose Data Pattern to open Setting Panel.
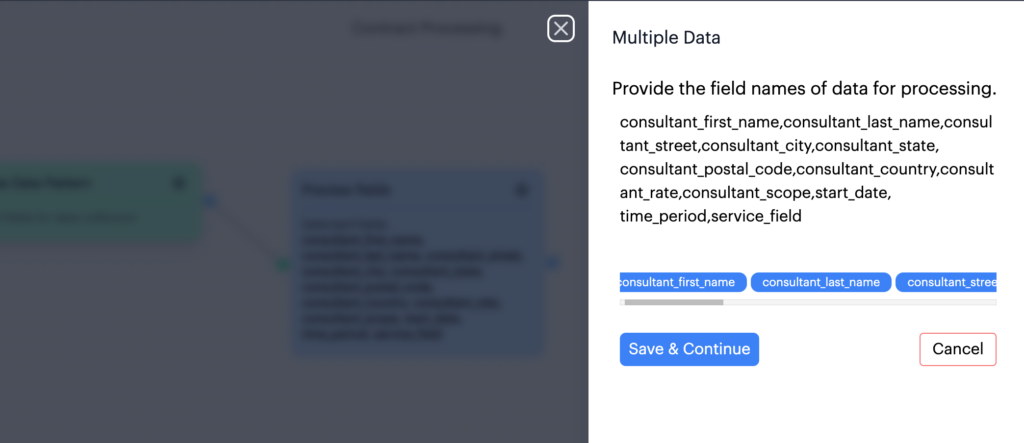
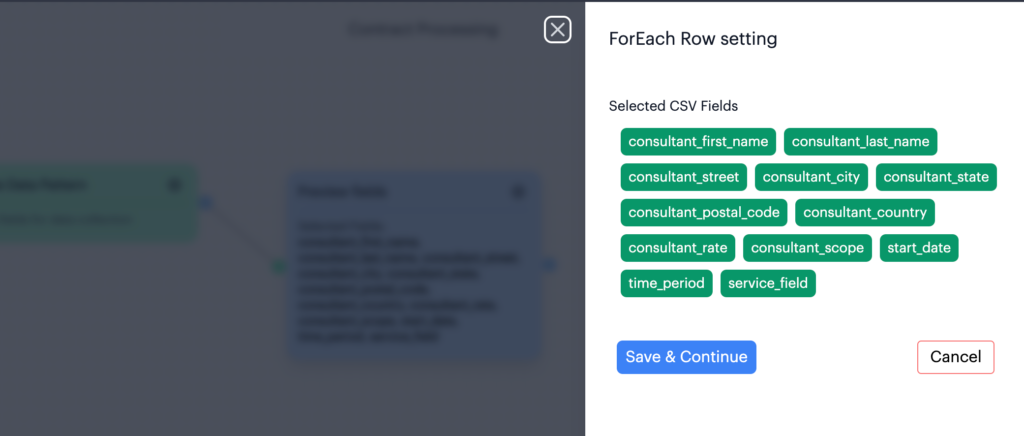
After providing the field names click on Save & Continue button. It will temporarily save the fields. Click on Setting icon of Preview fields to preview and confirm the field name provided.
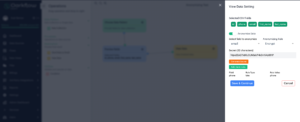
Click on Save & Continue for next step. Now from the Operations menu drag Personalized Documents operation to the right canvas. After drag, connect the two nodes: Preview fields and Personalized Documents using circles available on both operations.
Click on Setting icon of Personalize documents operation to open Setting Panel. Here we need to upload our document. As we upload the document, we get all the list of placeholders in the document. We also have the list of fields that we can use to replace the placeholders. We can set the file name that can be used for attachment in email.
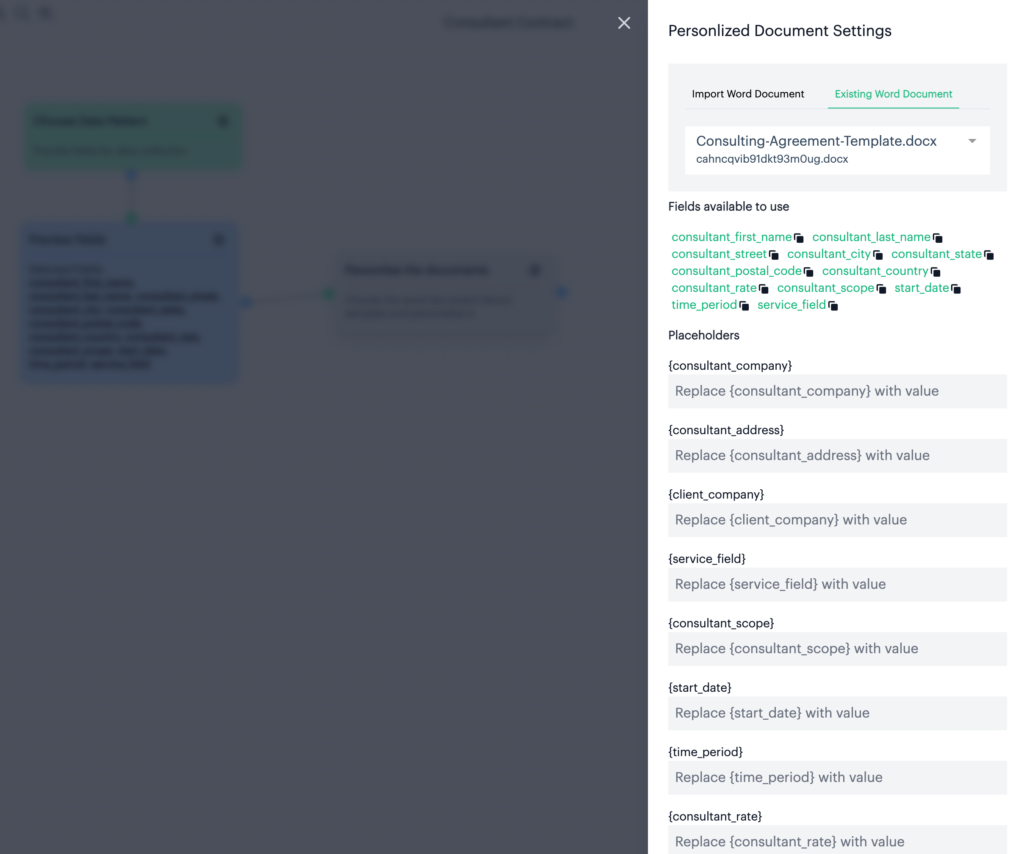
Now we need to fill the values for each placeholders. We can use the fields (in green text) as values. Each of such fields have copy icon next to them.
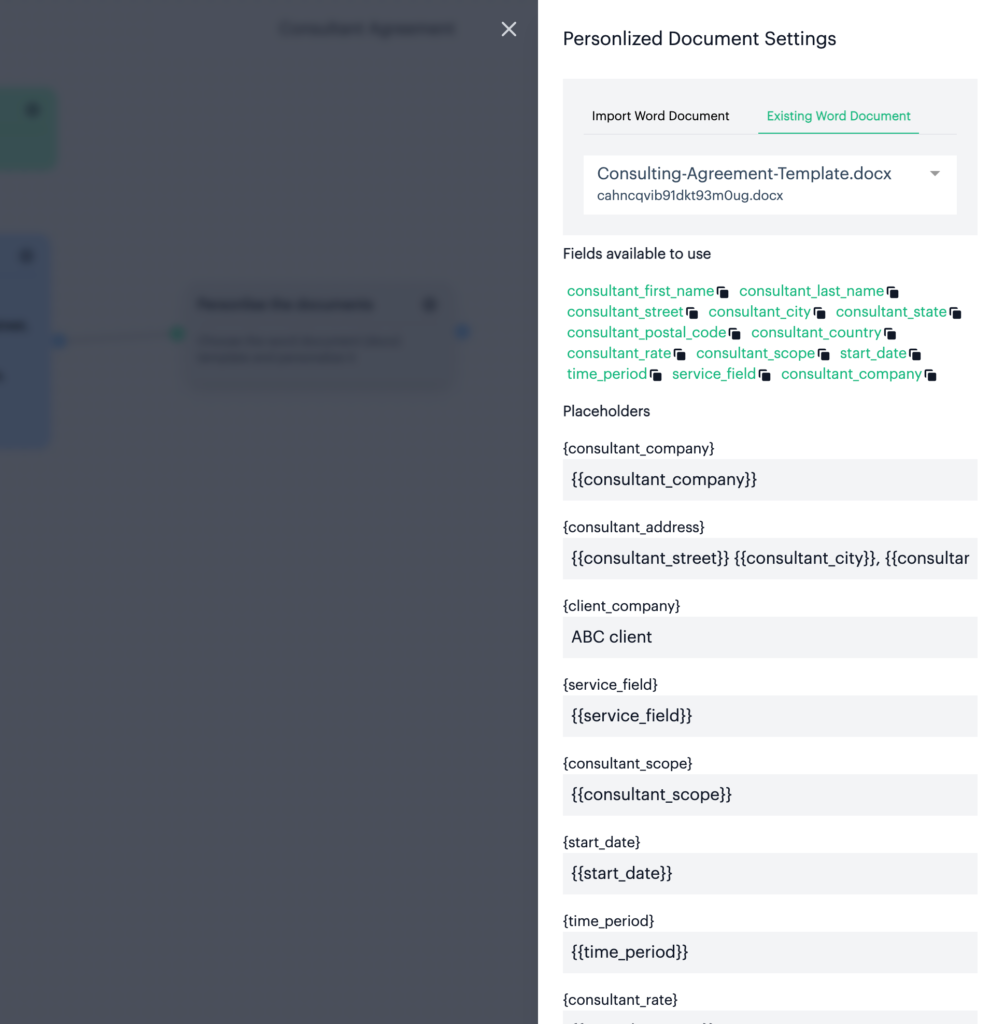
After all placeholders are filled, click on Save & Continue to store temporarily.
After the integration, the next step is to use the Send Email operation in the flow. For the purpose, drag the Send Email operation from left to the right canvas.
Click on Setting icon to open Setting Panel for the operation. Here user is required to choose the service provider for SMS that was created from above.
After the service provider is chosen, some basic information need to be provided.
Recipient Email field – Select the field from the dropdown. Email will be sent to this address
Email Subject – Provide the subject of the email
Email Message – Provide the email body content
Request Structure – When sending email using HTTP Protocol, it is required to pass the correct structure to the provider.This field is visible once the Service Provider is selected. Each provider has its own way of sending Email. This field provide the request structure in JSON. User need to provide the placeholder instead of actual data in the field.
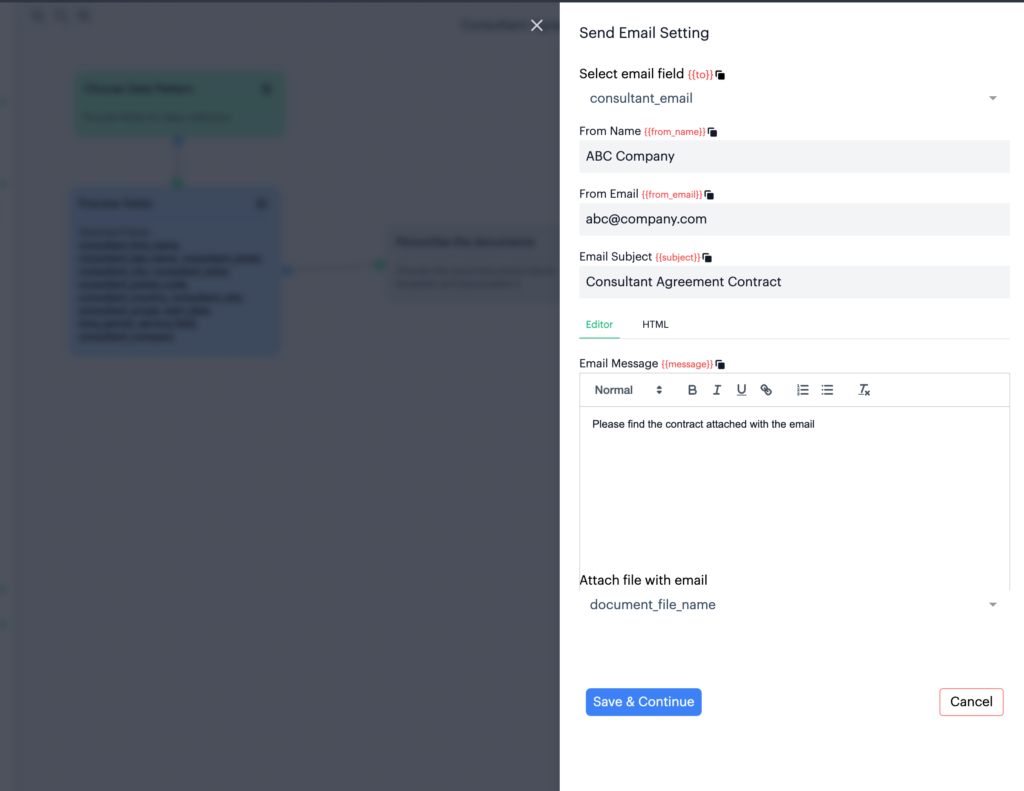
Click on Save and Continue to continue
Executing Flow
We are almost there :). After integrating Email provider, adding document template, building flow, integrating CSV file, finally we will execute the flow with the csv file.
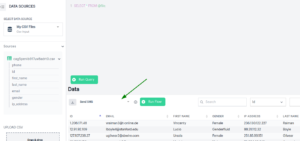
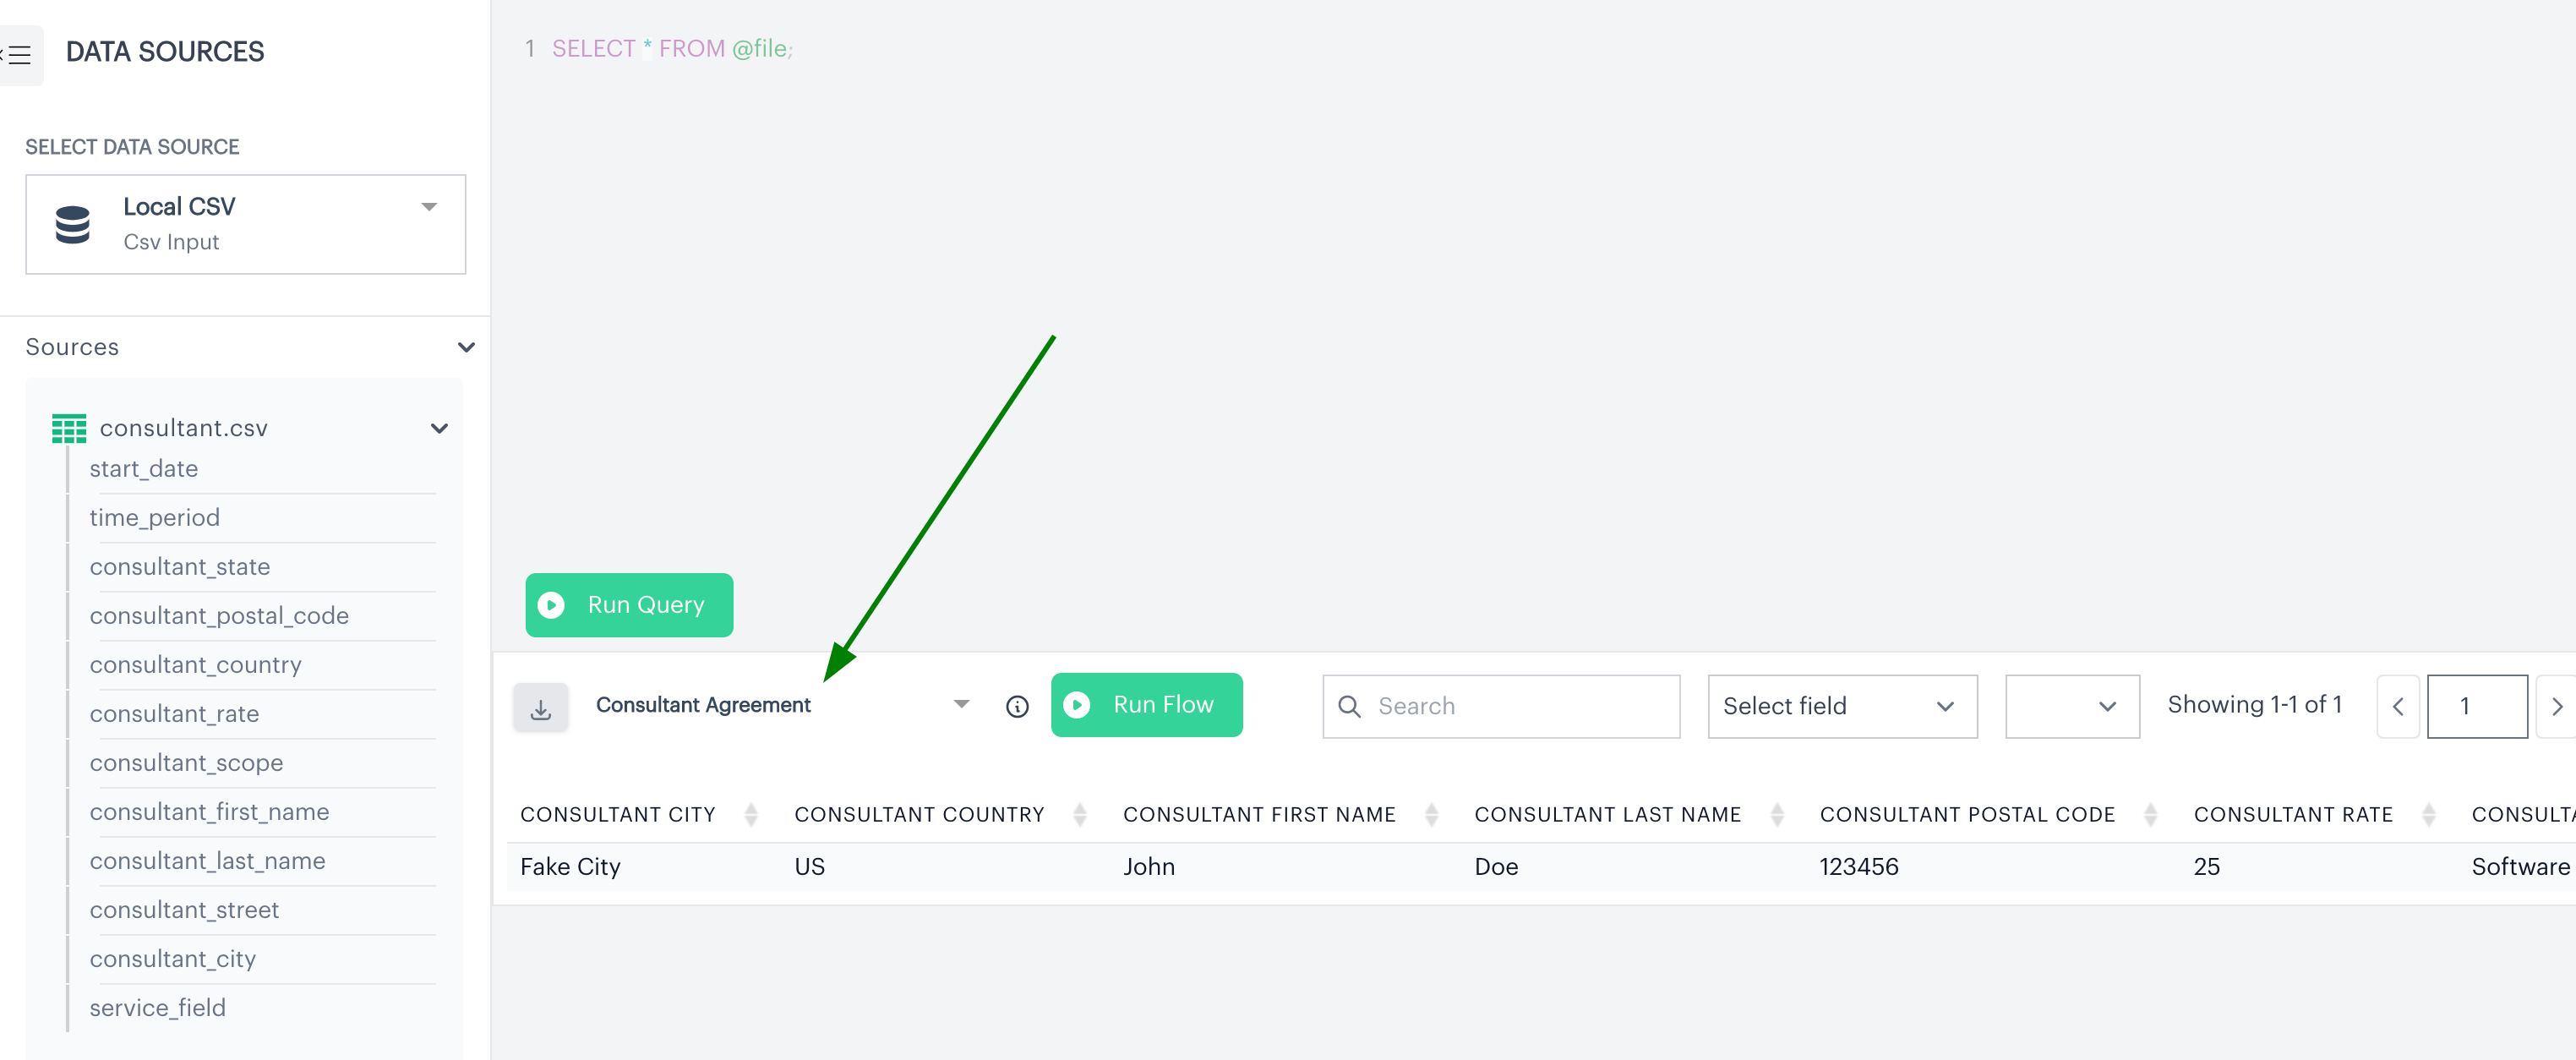
- Click on Data Sources in Datasource Manager menu from the left.
- From the Data source dropdown select the CSV source, that was integrated earlier.
- Once selected, the list down below will show all the CSV files that has been uploaded.
- Select the specific file that we want to send document as email to. After selecting the file, it will show the field names in list.
- To confirm on data, Click on Run Query button. This button will show the sample of data from CSV file.
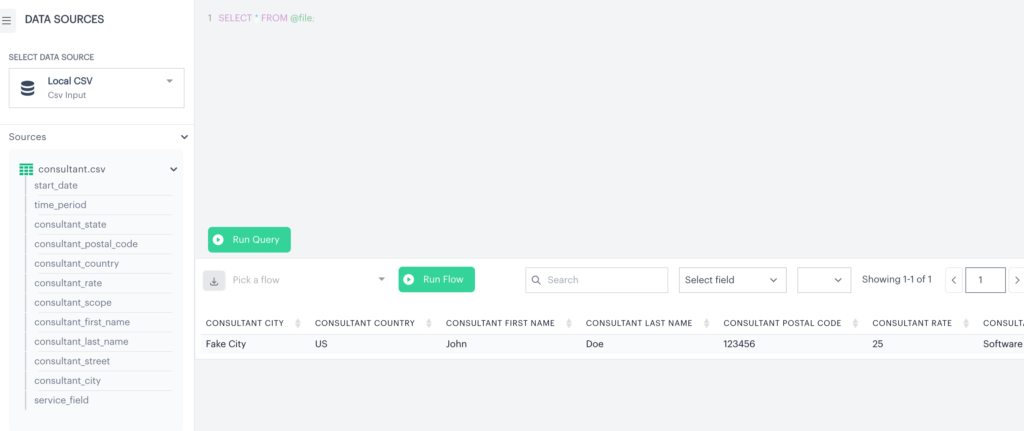
After confirmation, Choose the required Flow from the Dropdown and click on Run Flow button to execute.

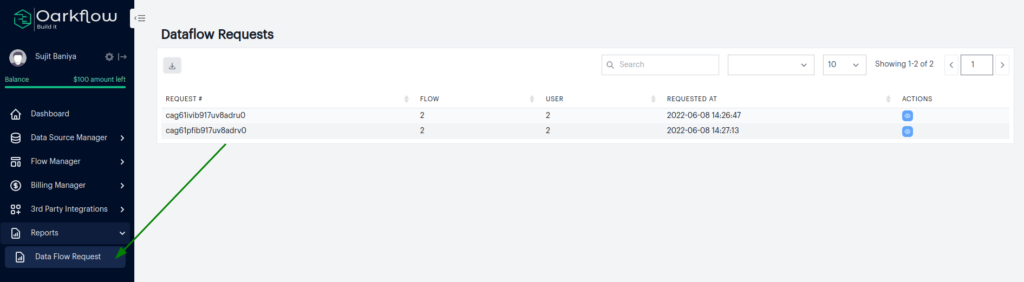
Yay! the process has started and the flow is running in the background. To view the reports, click on Data Flow Requests under Reports menu in left menu